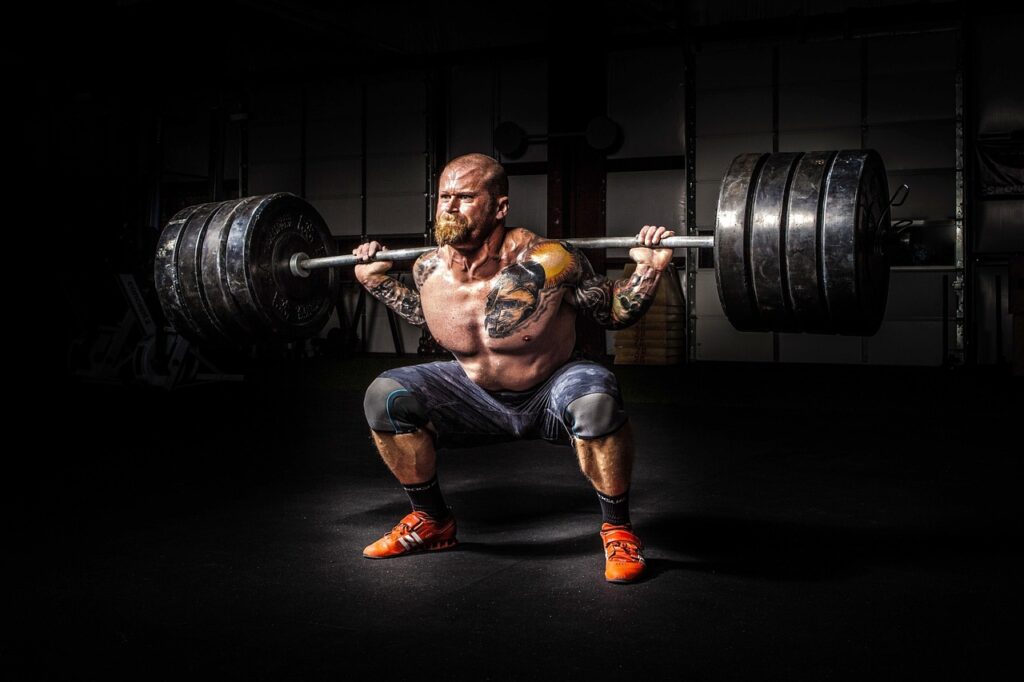
Why Your Squat Form Matters
Squats are the backbone of a solid strength routine. They hit multiple muscle groups, build power, and train your body to move better in daily life. But there’s a catch: done wrong, squats are just a fast track to aches and injuries.
Most issues stem from poor alignment or lack of control. The knees take the brunt when they cave inward under load. The lower back gets punished when form breaks down usually from rounding or overextending the spine. Hips? They suffer when mobility is ignored and depth is forced.
Solid squat form isn’t just about looking good in the gym. It’s about lifting safely, staying in the game long term, and actually seeing results. Proper technique protects your joints, prevents setbacks, and unlocks more strength over time. It’s not just how much you lift it’s how well you move doing it.
Key Alignment Principles
Getting your squat right starts with five basic alignment cues. Forget the fancy variations for now this is about building a form that won’t wreck your knees or fry your spine.
Feet: Start with your feet about shoulder width apart. Toes slightly out think 15 to 30 degrees not ballerina, not straight ahead. This opens the hips and helps the knees track safely.
Knees: They should follow the direction of your toes. Don’t let them collapse inward under pressure. If they cave in, your ankle and hip alignment go out the window.
Back: Hold a neutral spine. Not arched like you’re puffing your chest, not rounded like you’re collapsing inward. Just straight and strong through the whole movement.
Core: Brace like someone’s about to punch you in the gut. This is your internal weight belt. It keeps the midline locked and protects your lower back.
Head: Stay neutral here too. Don’t crank your neck up or tuck it down. Pick a spot on the floor slightly ahead and lock your gaze. It keeps your spine aligned from top to bottom.
Nail these five and you’ll be squatting like your joints actually matter because they do.
Breaking It Down: The Squat Step by Step
Mastering squat technique starts with a clear breakdown of each stage of the movement. Instead of jumping right into loaded squats, build your foundation with the basics.
Follow a Trusted Guide
To ensure you’re following proven mechanics, start with this detailed walkthrough: Squat Form Step by Step. It outlines:
Proper setup and stance
Movement cues for each phase of the squat
Variations to suit different mobility levels
Begin with Just Your Bodyweight
Before introducing any weight, focus on perfecting your form using only your bodyweight. This allows you to:
Build movement confidence
Identify mobility limitations
Develop stability and control
Tip: Treat bodyweight squats as serious training not just warm ups. The mechanics won’t change once you add weight.
Analyze Your Form Visually
Seeing your form in real time is a game changer. Mirrors can help, but video is even better:
Record from multiple angles: side, front, and 45 degree views
Check for signs of improper alignment (rounded back, knees caving, etc.)
Use slow motion playback to catch subtle form faults
Self assessment is one of the most effective tools for building lasting strength and avoiding injury. Combine it with feedback from trusted coaches or experienced lifters for best results.
Common Squat Mistakes to Watch For

Let’s keep it straight: bad squat form doesn’t just kill your progress it invites injury. Here’s what to avoid.
First, don’t shortchange your reps. Going too shallow might feel easier, but you’re robbing yourself of the benefits. Depth matters for muscle activation and mobility. If you’re stopping halfway, you’re doing half the work.
Next, keep an eye (and knee) on alignment. Letting your knees cave inward throws off your mechanics and puts strain on your joints. Focus on pushing them out slightly, tracking in line with your toes throughout the movement.
Heels off the ground? That’s a stability red flag. It usually means tight ankles or poor balance. Keep those heels planted to generate proper force and avoid tipping forward like a folding chair.
Speaking of leaning forward… don’t. Pitching your chest too far out over your knees loads your spine in all the wrong ways. Stay upright with a neutral torso. Your back will thank you.
And finally breathe, but do it right. Holding your breath without bracing properly can spike internal pressure and leave you lightheaded or worse. Learn the Valsalva technique: inhale deeply, brace the core tight like you’re about to be punched, and exhale with control at the top.
Squats don’t have to be complicated. But they do have to be clean.
Progressions That Build Better Form
Strength and good form go hand in hand and sometimes, the best way to improve your squat technique is by slowing down and working through targeted progressions. These movements help reinforce alignment, build control, and identify weak links in your mobility or stability.
Box Squats: Master Depth Control
Box squats are an ideal tool for learning how deep you should go without compromising form.
Use a box or bench at a height that challenges your range but doesn’t force a collapse
Focus on sitting back with hips first, not diving forward with knees
Briefly pause on the box to eliminate momentum, then drive back up with control
Why it works: Helps correct depth inconsistencies and prevents excessive forward lean.
Goblet Squats: Load Teaches Form
Holding a weight at your chest forces better posture and shifts your center of gravity for easier balance.
Hold a dumbbell or kettlebell close to your chest with elbows down
Keep your torso upright and core tight throughout the movement
Great as both a teaching tool and warm up for barbell work
Why it works: Reinforces an upright spine and proper squat mechanics under light load.
Pause Squats: Develop Control and Positioning
Adding a pause at the bottom of your squat exposes weaknesses and builds composure.
Pause for 2 3 seconds at the bottom position (below parallel)
Stay tight don’t relax during the pause
Focus on staying stable and square from all angles
Why it works: Forces muscular control and helps improve comfort in the deepest part of the squat.
Mobility Drills for Ankles, Hips, and T Spine
Improved mobility translates directly to better and safer squatting. Target these common trouble zones:
Ankles: Calf stretch against wall, banded joint mobilization
Hips: 90/90 stretches, pigeon pose, hip cars
T Spine (Upper back): Thread the needle, foam roller extensions
Why it matters: Poor mobility in any of these areas can break your squat form, especially under load.
Incorporate these drills as part of your warm up or post workout routine to keep form tight and joints healthy.
Safety First: When in Doubt, Pull Back
Even the most experienced lifters know: form comes first. Staying pain free requires more than strength it requires awareness and restraint. Here’s how to train smarter, not just harder.
Listen to Pain Signals
Minor muscle soreness is normal. Sharp pain or joint discomfort is not.
Stop immediately if you feel pain during a squat
Don’t push through joint pain this often leads to injury
Learn to distinguish between muscular effort and warning signs
Warm Up to Move Well
A good squat starts even before the first rep.
Spend 5 10 minutes warming up with light cardio and dynamic mobility
Focus on activating glutes, hips, and core
Include movement prep specific to squatting, like bodyweight lunges or air squats
Don’t Skip the Cool Down
Just as prep is essential, so is recovery:
Stretch key muscles quads, hamstrings, hip flexors
Use foam rolling or mobility tools to aid recovery
Slow breathing and low intensity movement help bring the body back to baseline
Get a Coach When You’re Stuck
If your form isn’t improving or something doesn’t feel right:
Work with a qualified coach or trainer who knows proper squat mechanics
Don’t rely solely on mirrors get feedback from real time observation or video analysis
Reinforce with Reference
Review and revisit proper technique often:
Use this detailed squat form step by step guide to check your fundamentals and troubleshoot issues
Correcting bad habits early and staying mindful is the key to long term success in lifting.
Takeaways You Can’t Skip
Great squats don’t start at the barbell they start at your feet. Stability at the ground level sets the chain reaction for proper movement. If your base is off, everything above it compensates. An unstable foot leads to a shaky knee, a compromised hip, and eventually, a back that’s screaming at you.
Before you ever think about loading up weight, get your alignment right. Feet shoulder width. Toes slightly out. Knees tracking with toes. Neutral spine, braced core, calm breath. These are non negotiable fundamentals. Anything less, and you’re training bad habits or worse, training for injury. Nail the bodyweight squat first. Own every inch of depth and control. Then you can earn your way to loading up.
The payoff? Massive. Small tweaks in form often unlock big improvements in strength, power, and joint health. You lift more with less risk. You move better in and out of the gym. And long term, your body thanks you for it. Quality beats quantity. Always.
 Jorvanna Zyphandra is the kind of writer who genuinely cannot publish something without checking it twice. Maybe three times. They came to nutrition and meal planning through years of hands-on work rather than theory, which means the things they writes about — Nutrition and Meal Planning, Exercise Techniques and Guides, Mental Health Resources, among other areas — are things they has actually tested, questioned, and revised opinions on more than once.
That shows in the work. Jorvanna's pieces tend to go a level deeper than most. Not in a way that becomes unreadable, but in a way that makes you realize you'd been missing something important. They has a habit of finding the detail that everybody else glosses over and making it the center of the story — which sounds simple, but takes a rare combination of curiosity and patience to pull off consistently. The writing never feels rushed. It feels like someone who sat with the subject long enough to actually understand it.
Outside of specific topics, what Jorvanna cares about most is whether the reader walks away with something useful. Not impressed. Not entertained. Useful. That's a harder bar to clear than it sounds, and they clears it more often than not — which is why readers tend to remember Jorvanna's articles long after they've forgotten the headline.
Jorvanna Zyphandra is the kind of writer who genuinely cannot publish something without checking it twice. Maybe three times. They came to nutrition and meal planning through years of hands-on work rather than theory, which means the things they writes about — Nutrition and Meal Planning, Exercise Techniques and Guides, Mental Health Resources, among other areas — are things they has actually tested, questioned, and revised opinions on more than once.
That shows in the work. Jorvanna's pieces tend to go a level deeper than most. Not in a way that becomes unreadable, but in a way that makes you realize you'd been missing something important. They has a habit of finding the detail that everybody else glosses over and making it the center of the story — which sounds simple, but takes a rare combination of curiosity and patience to pull off consistently. The writing never feels rushed. It feels like someone who sat with the subject long enough to actually understand it.
Outside of specific topics, what Jorvanna cares about most is whether the reader walks away with something useful. Not impressed. Not entertained. Useful. That's a harder bar to clear than it sounds, and they clears it more often than not — which is why readers tend to remember Jorvanna's articles long after they've forgotten the headline.